On the working of native maps on mobiles
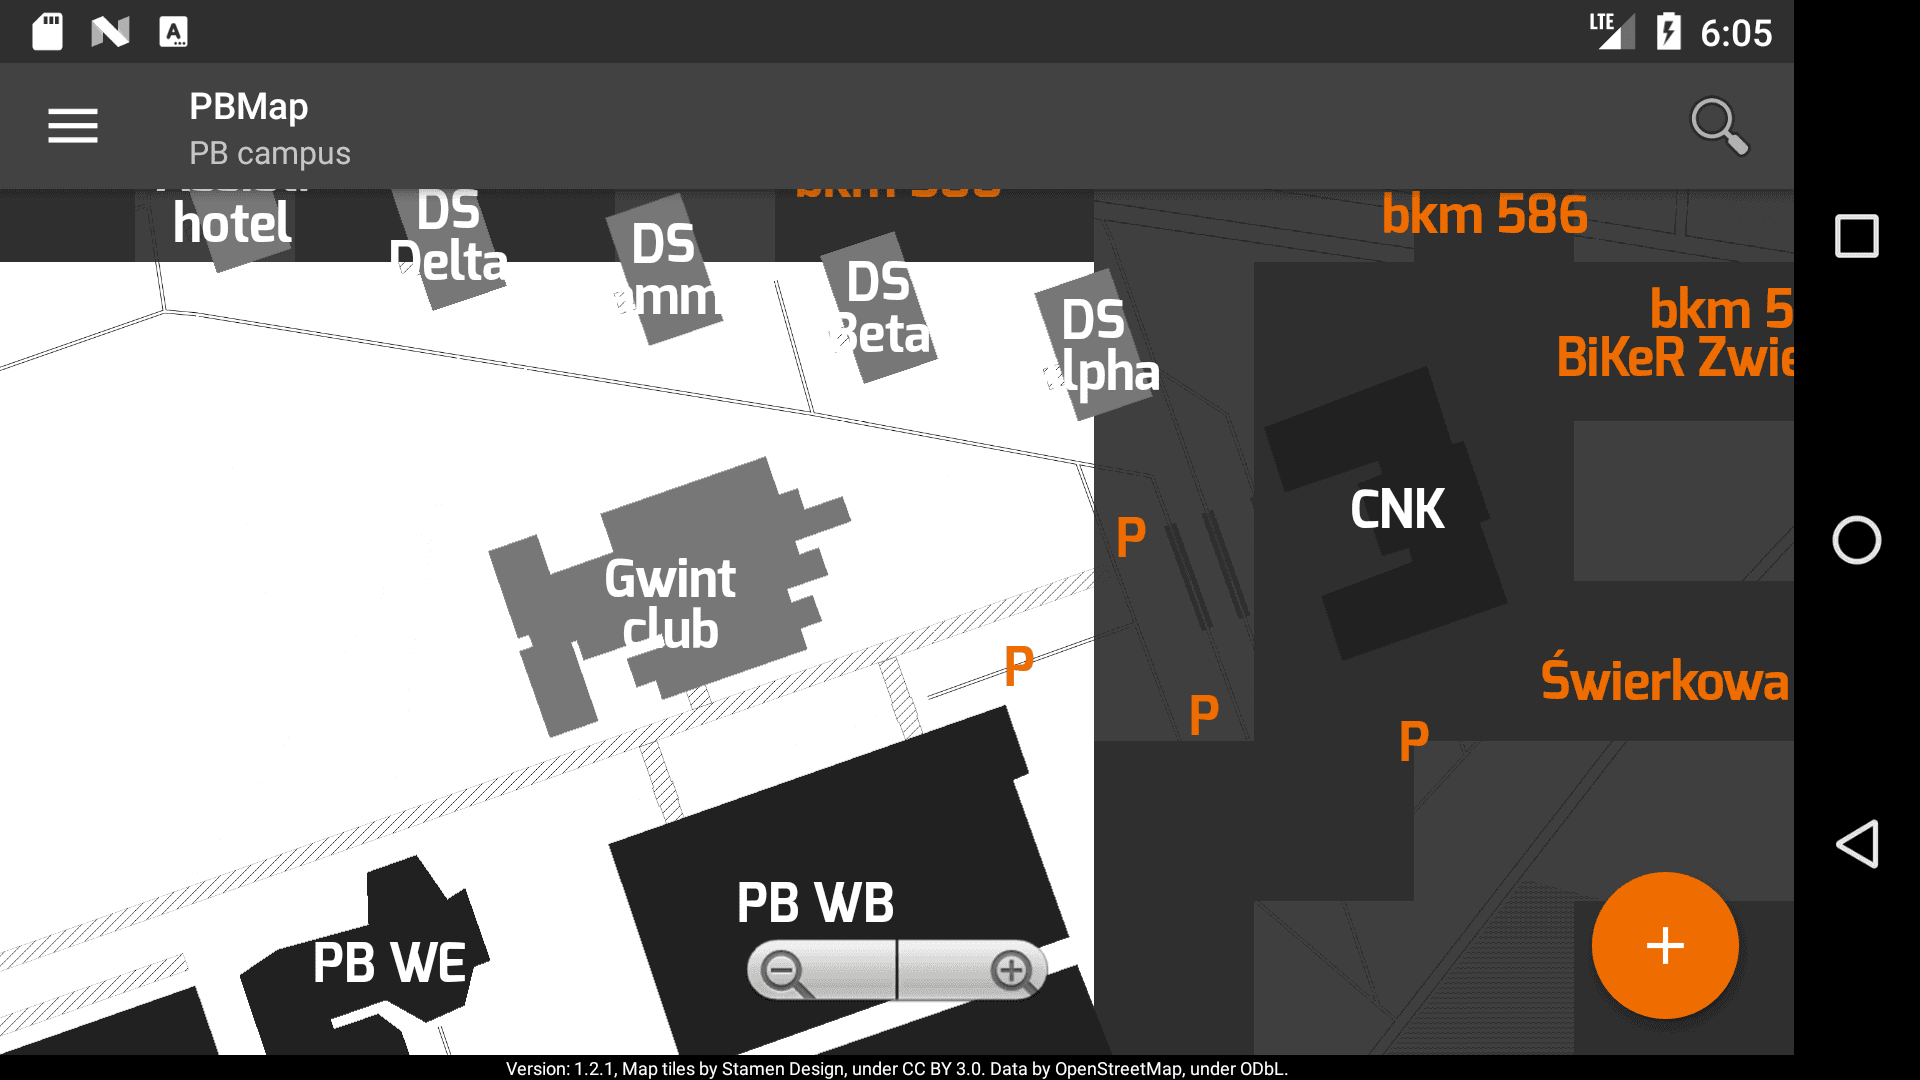
Creating your own maps in Android might come as hard at first, but after learning how they work, it can become a starting point of a pretty fun project. If you've yet to discover how such maps are implemented, and what problems might arise during the development — fear not. Today I will try to briefly explain some aspects of map engine, resource preparation, mapping and routing. This will be based on my own experience of creating apps connected with mapping, with the most recently updated one — PBMap (interactive map of the Bialystok University of Technology for mobile devices).
Map engine
One of the limiting factors of mobile devices is resources. The problem which arises in our case is the map image itself. Ideally, we would like to have a very high-quality map. This is usually connected with a high-resolution image, which in addition increases with the area size. Let's take a 4000px x 4000px map as an example. It is a reasonable size for displaying a detailed map of a university campus. The size of the loaded image which represents this map in ARGB8888 format will take over 60MB of memory! It will take some time to load, but the worst part is that the interaction with it will be terrible. Your application will start skipping frames. Freezing on zoom will be inevitable, and dragging will become a hell. Of course, if you don't run out of memory at some point.
So what to do here? As you would expect, there are a lot of different resolutions like progressive loading or subsampling, but let's pick a correct tool for our problem and see how map engines handle this.

Tiles
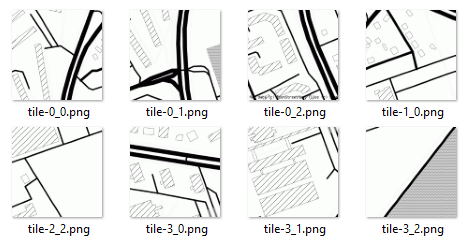
Instead of loading one big image, the map is divided into tiles. This greatly increases user experience as each tile is much smaller in size and does not have to be loaded until needed. The engine will load only a few tiles off the screen trying to keep smooth scrolling. If you swipe very quickly, you will certainly see how the loading can't keep up with the user action. This is an accepted give-and-take to achieve a good user experience. But this resolves only half of the problem. If we zoom out we will basically go back to our initial problem...
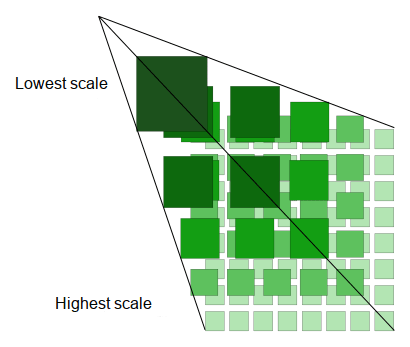
How map engines cope with this problem is that for each zoom threshold, different assets are loaded. With a maximum zoom, we want a pretty detailed map, but when zooming out, the details become less important. It's ideal to load images with a much worse resolution, as the details won't be visible anyway. What this means is that if you want to have a heavily zoomable map, it's recommended to prepare map images with various resolutions that correspond to the zoom level and chop them into tiles. The engine can also take care of caching and reusing bitmaps to improve resource usage.

Layers
Managing tiles is only a part of the map engine. What's a good map without a collection of POIs (Point Of Interest)? You would usually require a map to display useful places like stations, shops, hospitals, police, etc. To achieve this, various overlay layers are used. From a simple text placement, through markers and images ending on interactible shapes - this concedes a basic list of features offered by a decent map engine.
A problem with overlays you might encounter is that you have to manage them by yourself. Usually, the engine will only take care of the tiles. If you create a few hundred or thousand of markers, your app might start freezing or go out of memory. Keeping them as simplest as possible may increase the performance. A preferred solution is a viewport marker management, but hooking to scroll events is sometimes expensive. A last resort requiring a change in architecture is to pre-render the map on a server.
Mapping
Assuming you want to add some POIs to a prepared map, you will need to define its coordinate system and the map bounds. For a map of a real space, the geographic coordinate system is a no wonder with latitude (north-south position) and longitude (east-west position) measurements. A decent engine will help you seamlessly translate real-world coordinates into a position on your map (image) and the other way around. Though, if you're not using such coordinates and not integrating GPS, you might as well skip this topic.
If you had to do it by yourself, you would not only need to translate the coordinates into pixel positions but also keep in mind the scale (zoom level). Though, it hasn't all been said yet. The translation part is the trickiest one. This is a very pretty broad topic. There are multiple datums (models of Earth), map projections and there is always some distortion when representing a sphere's surface on a plane.
From a layman point of view, an important mention would be that most web mapping applications use the Web Mercator projection. This projection is pretty close to WGS84 utilized by the GPS system (check the differences). The engine may not provide the implementation to translate coordinates to the desired projection, but it usually gives some interface for your own calculations. If you have a small scale map, a default linear interpolation will usually yield a negligible error on the positioning.
Routing
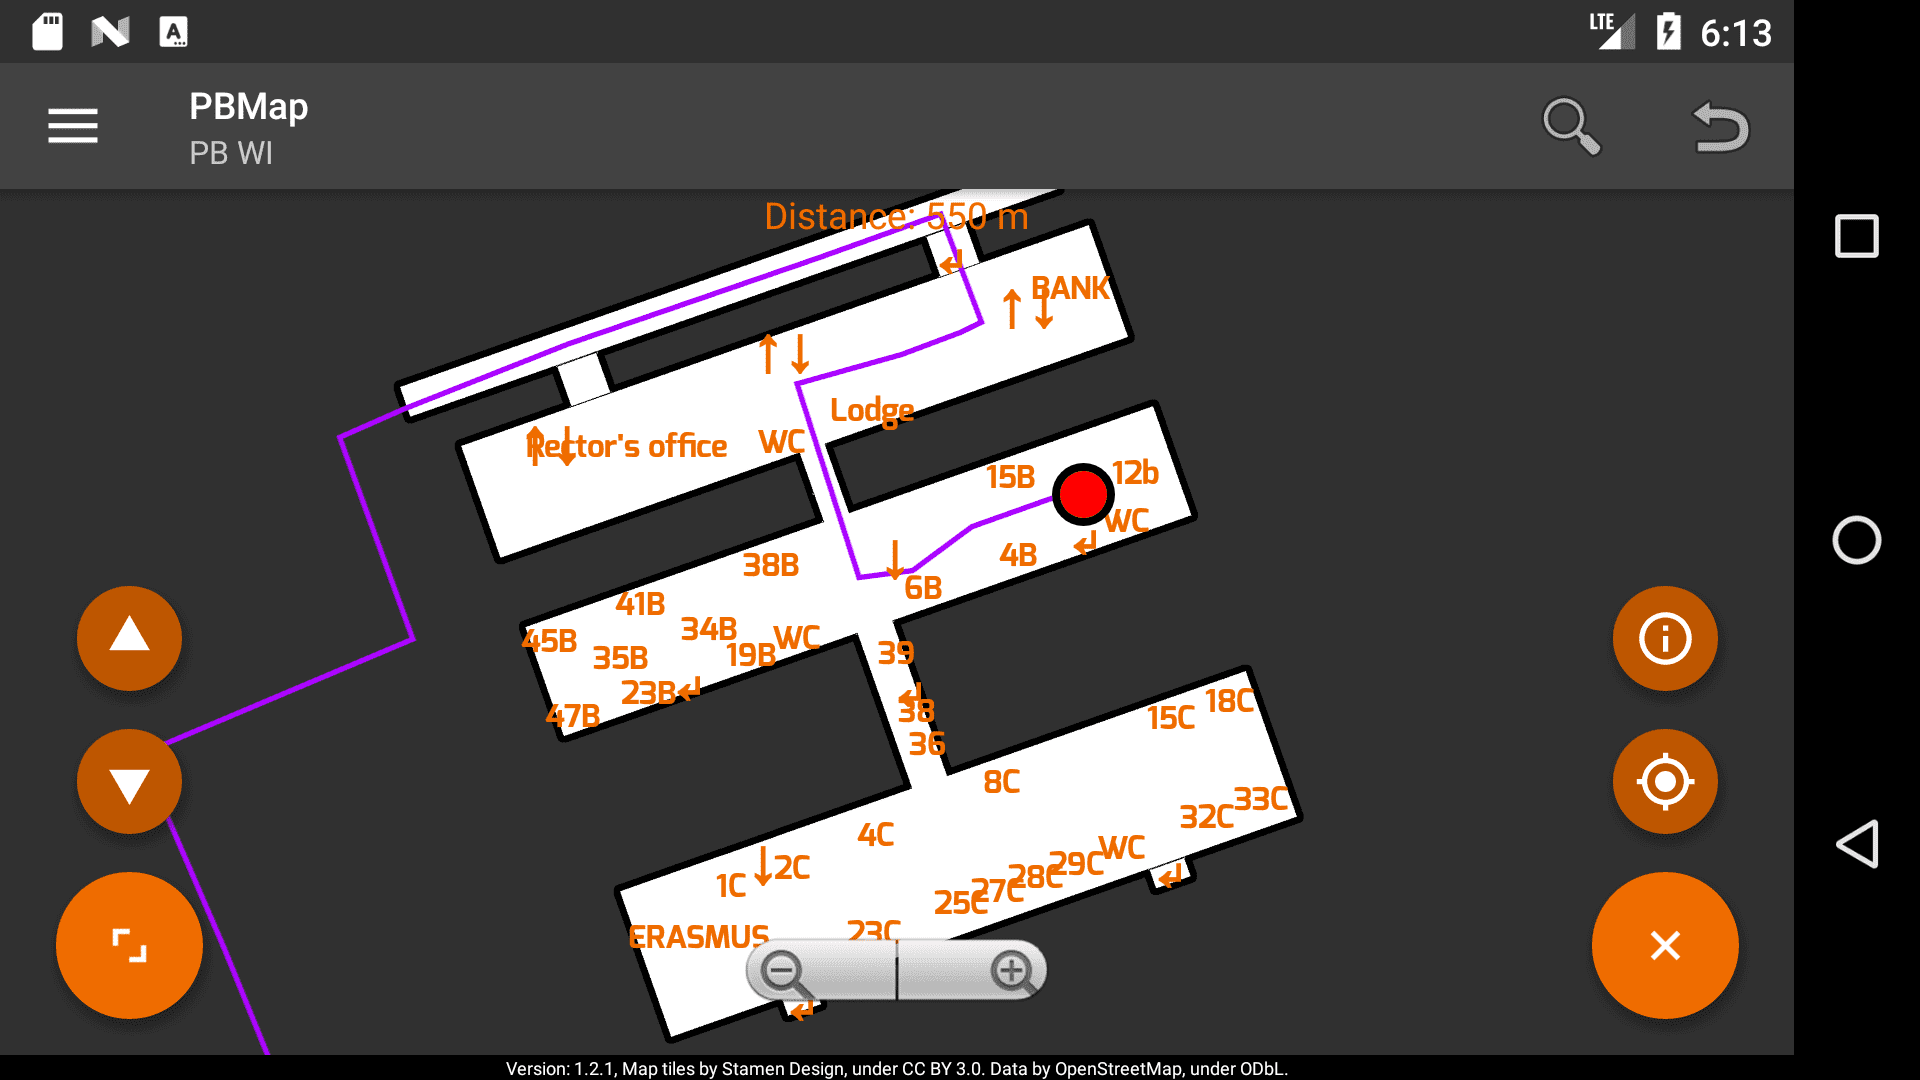
In my opinion, this is one of the most satisfactory topics in mapping. You take the algorithm you learned in uni — Dijkstra (weighted graph) or BFS (unweighted), implement it and it works. Top it with graphical route overlay and it starts looking gorgeous. Integration with a GPS can be a bit quirky in some cases but brings a lot of value. Also, don't forget to display the distance to the target!
If you consider an indoor map, you might need some custom logic for displaying routes spanning over multiple floors. This is the place where you might need the third dimension — altitude. The simplest implementation is to hide the edges with heigh different than the one defined in the map. For outdoor ones, a color gradient might be meaningful.

Resource preparation
Summing up — three things you would need for a decent custom map application are the tiles, data about POIs and routes. I enumerated them based on size, from biggest to the lowest. From my experience, the tiles are at least 10 times bigger in size than the rest two. Considering indoor mapping, if you want to support a few (10-20) buildings, you would end up with tiles of 5-10MB size. A fully offline mobile map application seems to be reasonable up to this point. However, if multiple clients are considered, it might be better to consider a separate build-packs or a backend server.
As for keeping the data, in my own applications, I usually prefer to keep it in the XML files. I've yet to implement a live way of modifying POIs so this structure is very feasible for me to prepare mapped data. Ideally, I would keep this information in the database for better performance, though, the apps load smoothly on modern devices, and they work decently on low resource emulators in Travis.
A sample map data structure might look like this:
<map height="3072" id="PB_campus" route_path="routes/pb_campus.xml" url="http://pb.edu.pl/"
    width="5120">
    <tiles_configs>
        <tiles_config height="256" path="tiles/pb_campus/1000/tile-%d_%d.png" width="256"
            zoom="1" />
        <tiles_config height="256" path="tiles/pb_campus/500/tile-%d_%d.png" width="256"
            zoom="0.5" />
        <tiles_config height="256" path="tiles/pb_campus/250/tile-%d_%d.png" width="256"
            zoom="0.25" />
    </tiles_configs>
    <coordinates>
        <coordinate alt="150" lat="53.120405" lng="23.142700" />
        <coordinate alt="150" lat="53.115460" lng="23.156433" />
    </coordinates>
    <space id="PB_WI" reference_map_path="data/pb_wi.xml" url="https://wi.pb.edu.pl">
        <coordinates>
            <coordinate alt="150" lat="53.11696" lng="23.14564" />
            <coordinate alt="150" lat="53.11726" lng="23.14709" />
            <coordinate alt="150" lat="53.11641" lng="23.14759" />
            <coordinate alt="150" lat="53.11611" lng="23.14614" />
        </coordinates>
    </space>

    <spot id="bkm_529">
        <coordinates>
            <coordinate alt="150" lat="53.1162607" lng="23.1451221" />
        </coordinates>
    </spot>
    <!--...-->
</map>
In my case, each map is also bound to a route consisting of bidirectional edges:
<route id="pb_campus">
    <edges>
        <!--CAMPUS BEGIN-->
        <edge>
            <start alt="150" lat="53.11653" lng="23.14490" />
            <end alt="150" lat="53.11669" lng="23.14553" />
        </edge>
        <edge>
            <start alt="150" lat="53.11669" lng="23.14553" />
            <end alt="150" lat="53.11697" lng="23.14536" />
        </edge>
        <edge>
            <start alt="150" lat="53.11697" lng="23.14536" />
            <end alt="150" lat="53.11701" lng="23.14551" />
        </edge>
        <!--...-->
    </edges>
</route>
As for tiles, I've reused some open-source snapshots and made my own basic indoor maps. The tiles can be generated by any program for generating tiles :) As far as I remember I used ImageMagick recommended by the author of TileView library which is at the core of PBMap. After creating the tiles, the map interface will take care of loading and managing them in the correct order.
convert image.png -crop 256x256 -set filename:tile "%%[fx:page.x/256]_%%[fx:page.y/256]" +repage +adjoin "tiles/tile-%%[filename:tile].png"

Summary
Creating your custom map with a mobile, native look and feel is a really fun process. Not only you can learn about how map engines work and take a peek at different map projection models, but also learn different aspects of your mobile system chosen for development. After implementing the basic map, it's a good time to find out how to save the map state together with your application state. Some other fun parts to consider are searching the POIs and implementing full navigation. There is also a broad topic of indoor localization which slowly, but steadily is gaining popularity.
