JMeter — functional REST API tests
JMeter is mainly used for load testing, though it is also a viable choice for functional testing. Let's start with REST API testing. Two necessary features required for it are a method for calling the API and a possibility to verify the data through assertions. Both of them are present in the JMeter. What's more, you can even connect, in an almost out-of-the-box sense with database (JDBC driver might be required for less popular vendors). By default, though, you get everything what you need and for its clunkiness (from a developer's point of view), JMeter makes up with its plugin system. It also has fairly low entry point for less programming oriented testers. Since figuring out everything on your own might take some time, I will show you few examples which should make it easier to create your first tests.
Let's take a simple REST CRUD API with some minimal logic as an example and jump straight into testing. The basic structure of a test in JMeter consists of:
- Test Plan (root element);
- Configuration elements (Connection configuration/User Parameters/Requests Defaults);
- Thread Group — simulates multiple users or executions;
- Sampler (HTTP Request Sampler/JDBC Request Sampler) — an equivalent of a single test;
- Assertions (Response and JSON assertions, extractors).
In our first tests we will verify a simple GET /v1/users/{id} from previously mentioned API. Ideally we would like the input id parameter to be randomized from the database. The method should return correct user data and in case the user has been removed a 404 error should be returned. Imagine you already have your application running, this data is visible somewhere and you want to expose it with REST interface. It's often easy to check which DB columns the data comes from, but re-using existing logic might be infeasible due to legacy or spaghetti code. Even if, existing logic might also contain bugs under some specific data state since you might not have any legacy tests, though, if you have large enough data sets, it's possible to run plentiful randomized tests which will detect them. It's also very easy to run them as load tests and detect performance and multithreading problems.
Let's now go through each of the 5 steps mentioned above and indicate some useful parts:
Test Plan
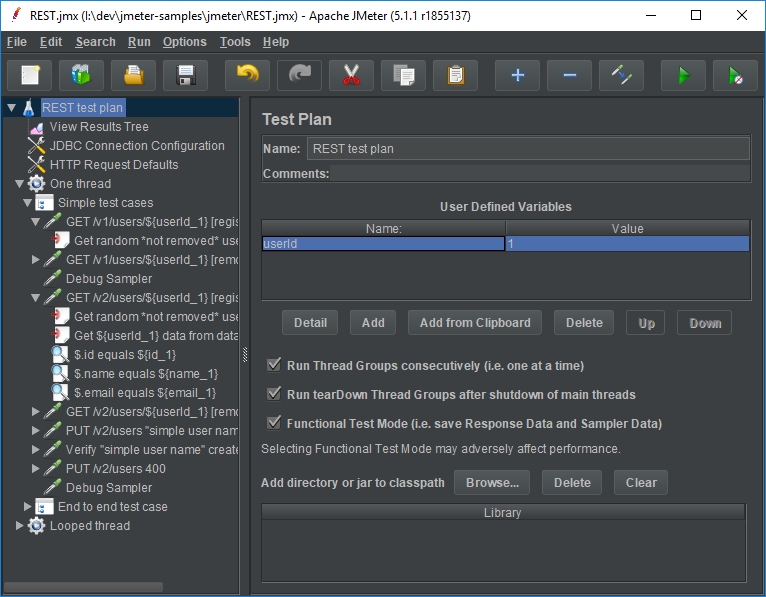
Test Plan is a root element for JMeter tests. Using this element you can add user defined variables (to which you can refer later with ${param_name} syntax), select to run your Thread Groups consecutively (e.g. to isolate load tests) and add jar to classpath. Usually all jars are loaded by default from jmeter/lib directory and should work out-of-the-box if you just put them there.
Configuration elements and listeners
Under Test Plan I recommend adding an element called View Results Tree.
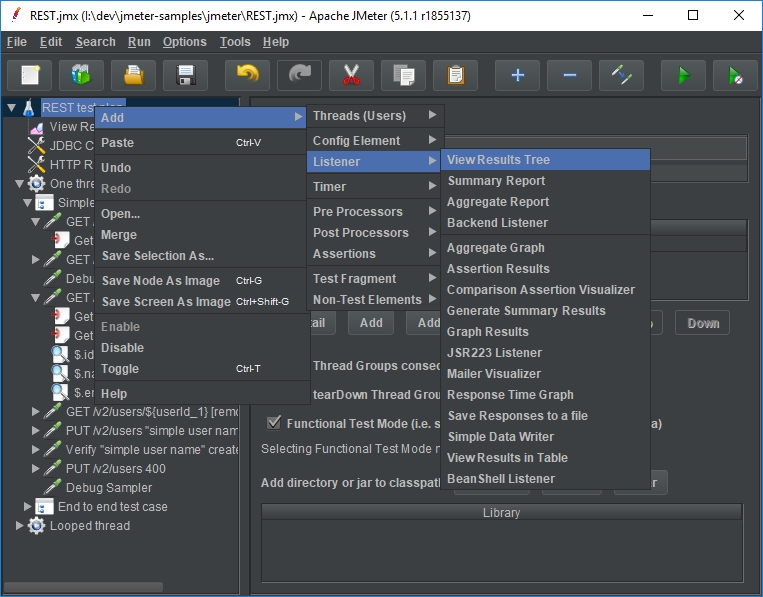
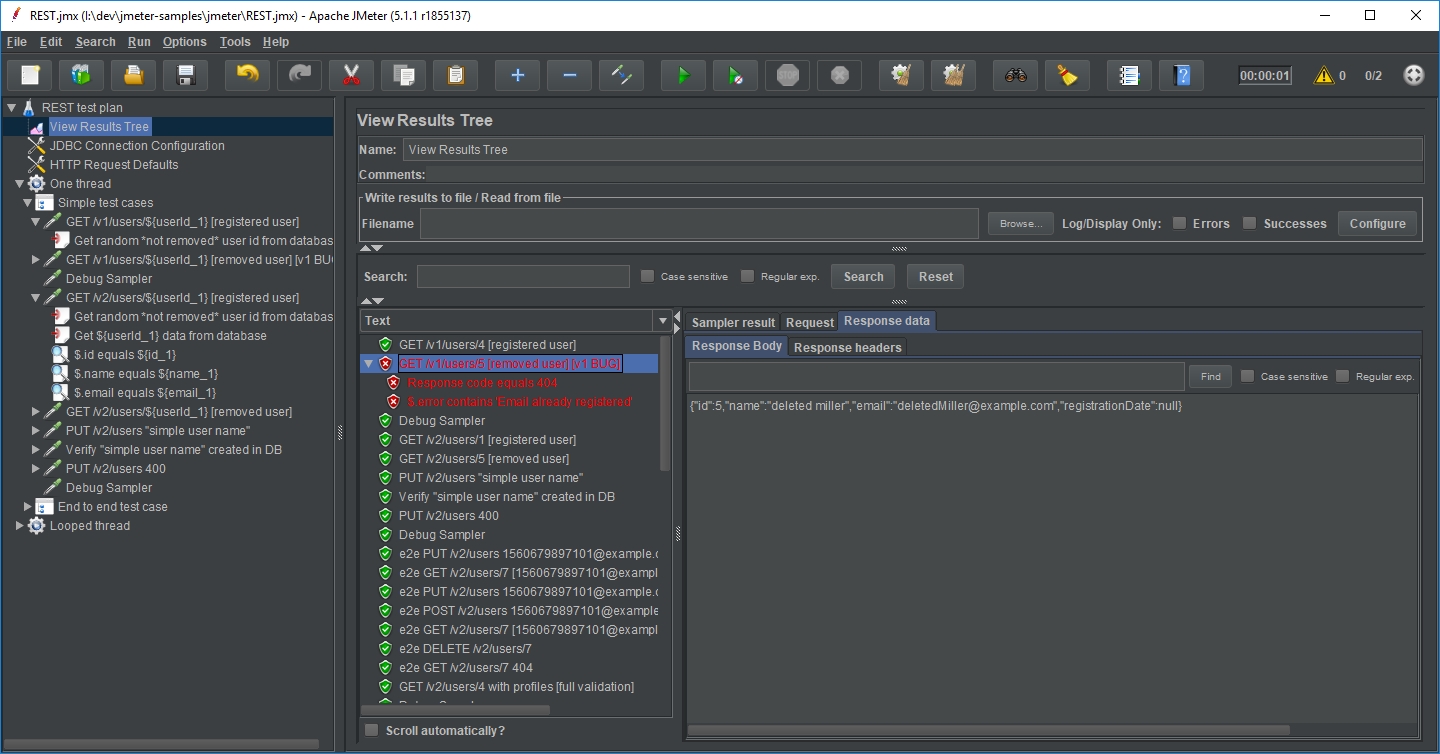
It will show you the results of your test runs. Among other things, you will know whether test failed or completed successfully and what was the request and response data. It's also possible to enter a filename for report generation. If you want to clear the results before running the tests again, you can do so from the Menu -> Run -> Clear or the toolbar.
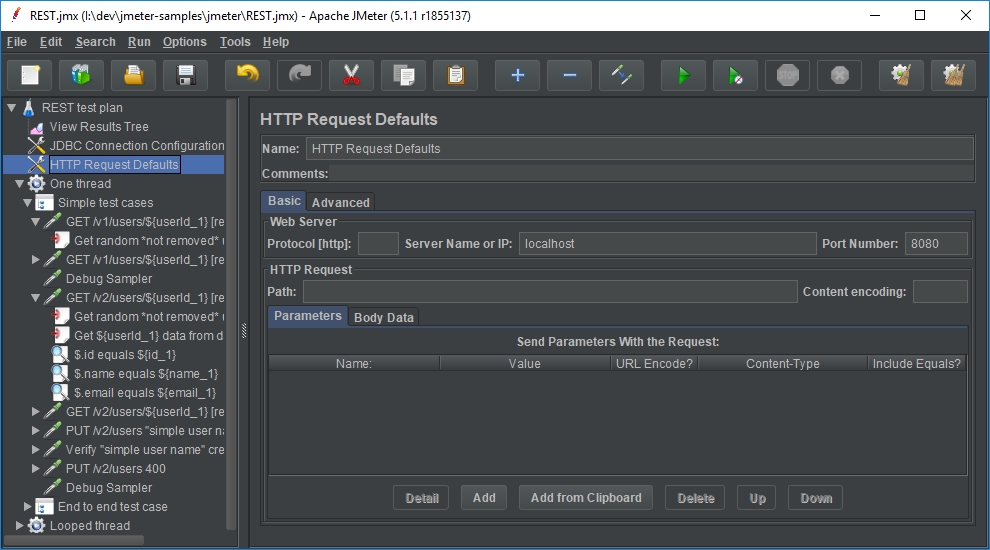
Next useful element is HTTP Requests Defaults. This element configures some common options for HTTP Request sampler. It's extremely useful when running tests on multiple environment, as it's the only place you will need enter the server location.
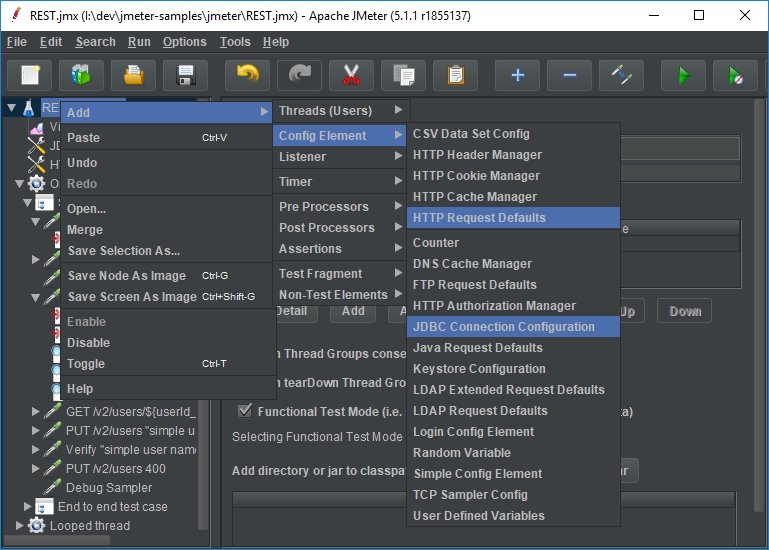
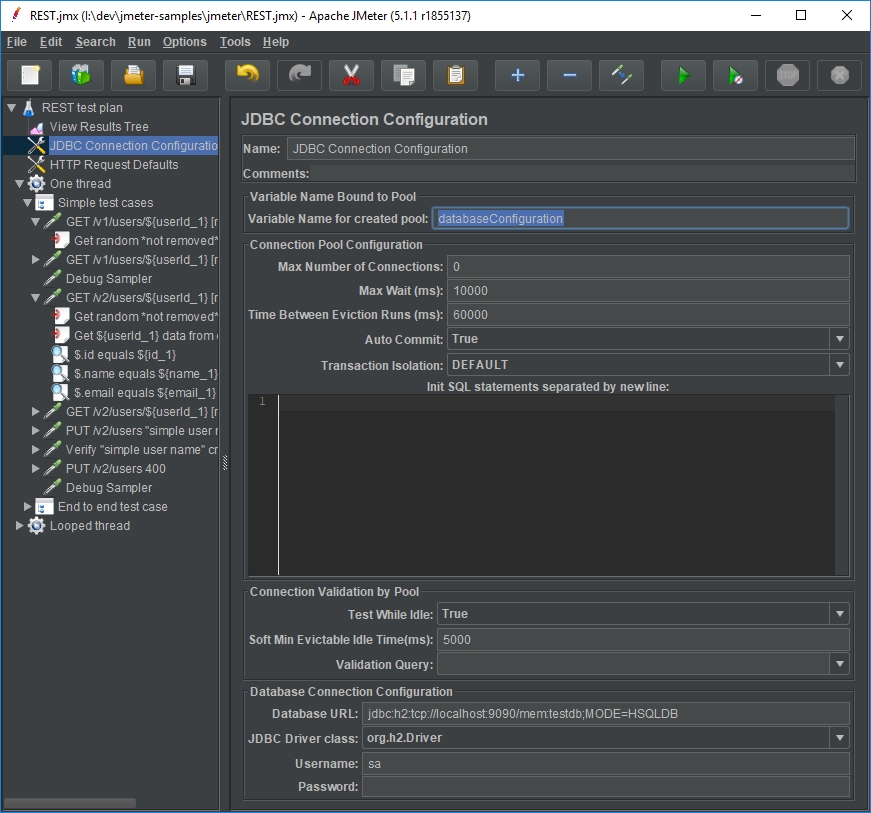
The last configuration element, which is important in our case, is JDBC Connection Configuration. This element configures connection with database through JDBC driver. The important thing is to remember the variable name for created pool. We will refer to this when creating JDBC Request.
Thread Group
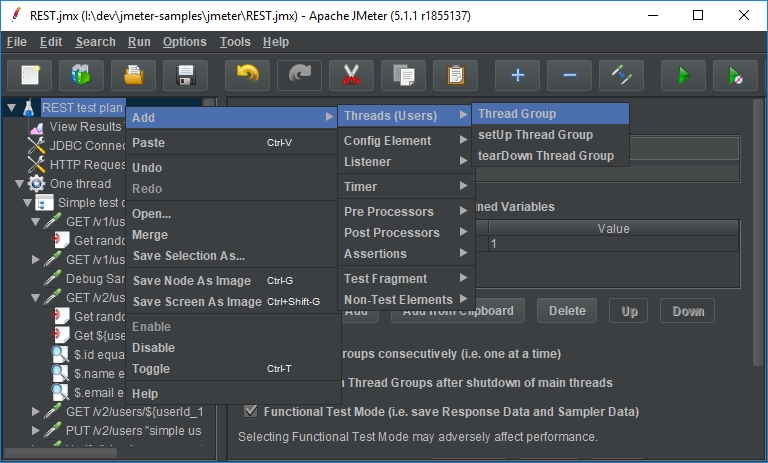
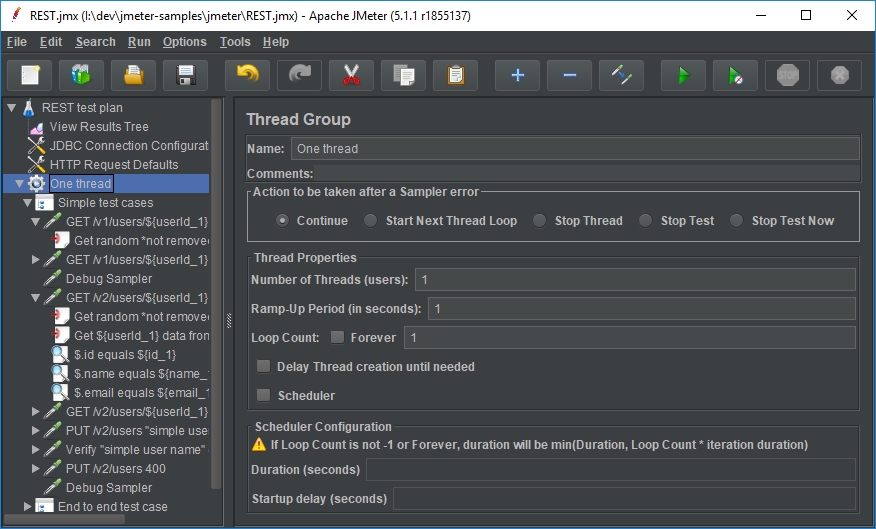
This is the starting point for our test cases. Three main things that we might be interested in here are: action to be taken after Sampler error, number of users (threads) and loop count.
Sampler
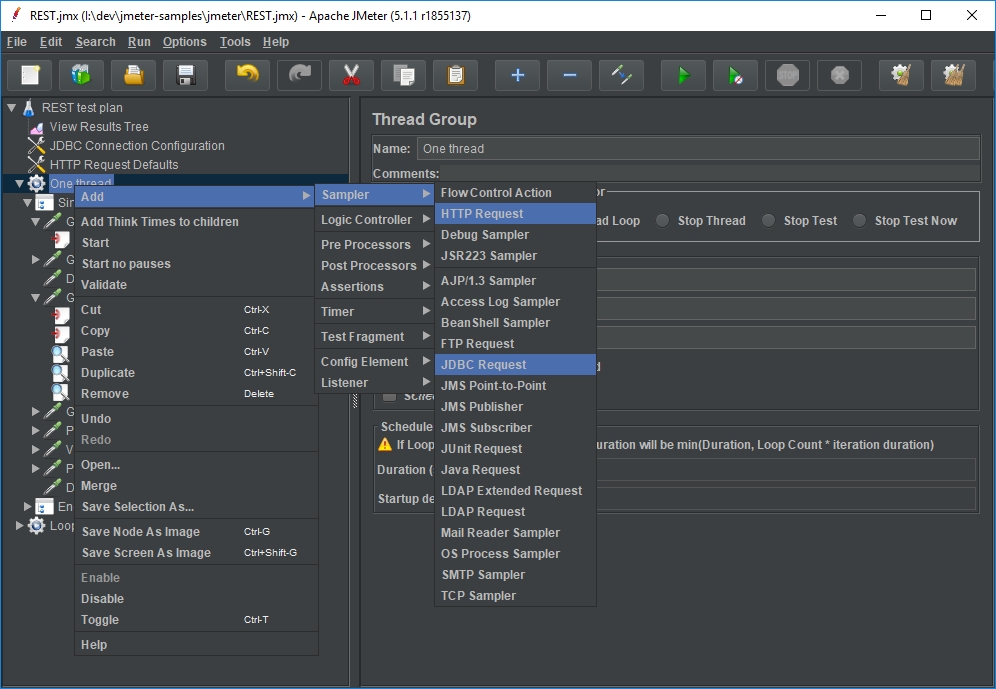
Two main samplers which we will use for REST API tests are HTTP Request and JDBC Request. Depending on test case you may either want to use one as sampler and the other one as pre/post processor or the other way around. HTTP Request sampler looks just like HTTP Requests Defaults. JDBC Request, however, is a bit more complicated:
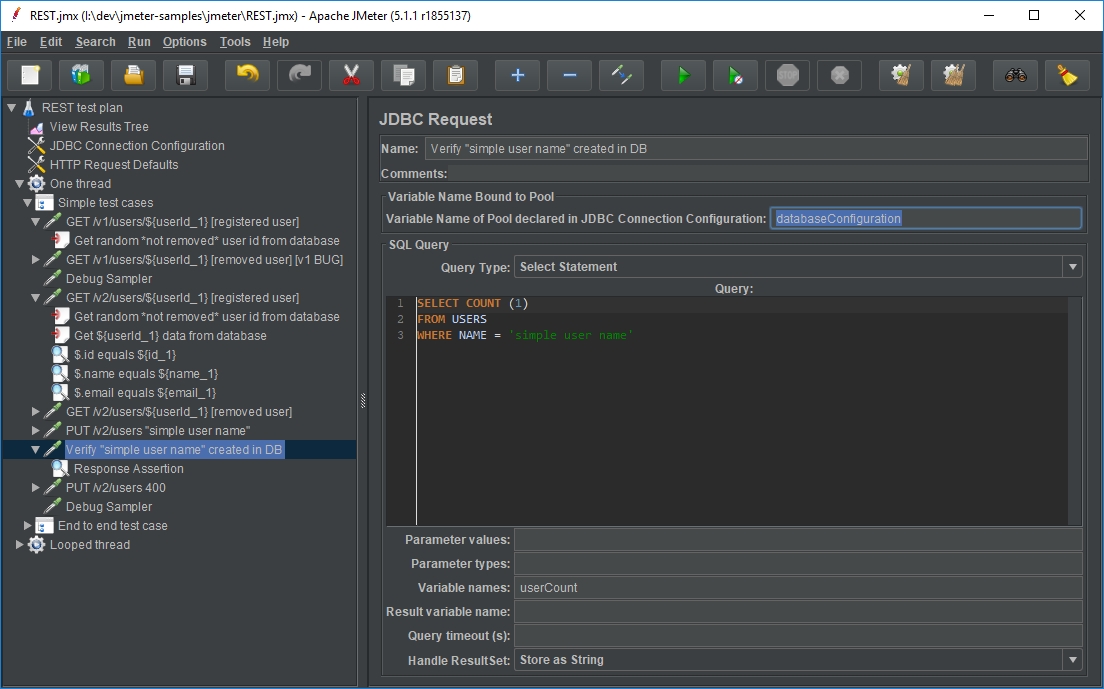
It's required to set a pool name that matches the one set up in JDBC Connection Configuration. Next we select the query type. Useful thing to remember is that a commit query is required to persist insert in the database. It's also worth mentioning that in some db types you should skip the ending semicolon (Oracle DB), otherwise you will get an error. Lastly, there is the bottom form.
I usually ignore the parameter values and types fields which allow setting parameters in a JDBC manner. For most common use cases, I refer to parameter values directly in the query using ${param_name} syntax. In the "variable names" field you should set names for output variables. They will be loaded in a sequence from the result set with numerals appended for each row starting from 1 e.g.: id_1, id_2. By `${id_#} you will be able refer to the number of returned rows. It's also possible to use the result set (next field) which will provide access to the results in form of an object — list (rows) of maps (column values).
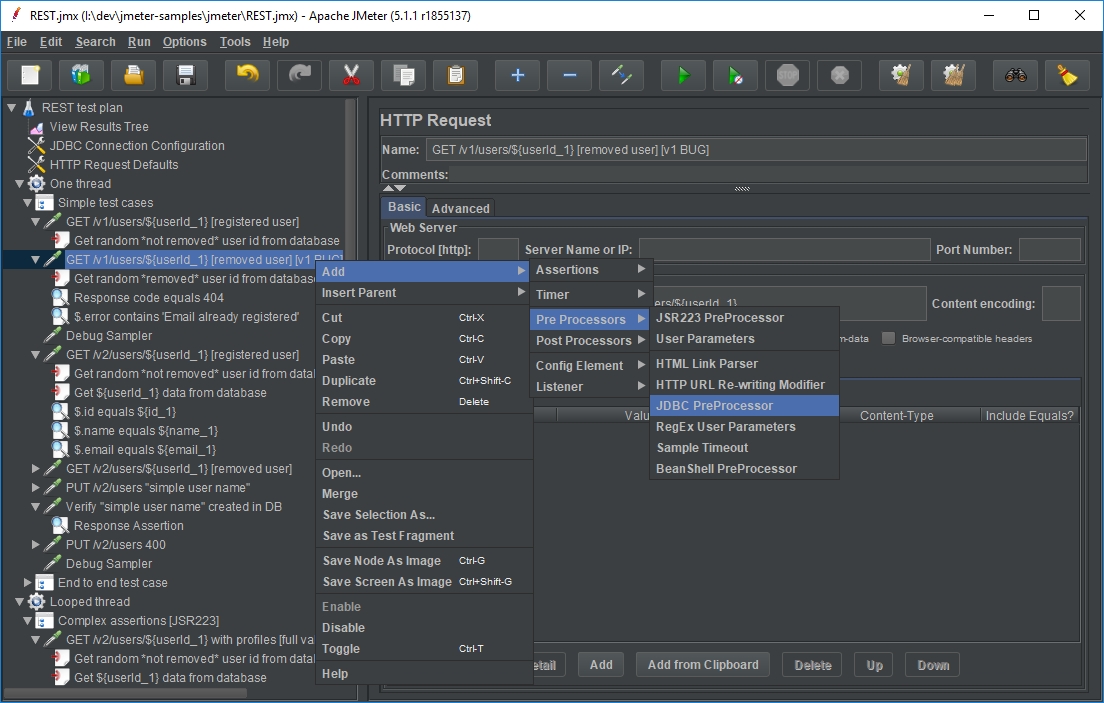
The way you could go with testing GET methods is to create a HTTP Request for (in our case) /v1/users/${userId_1} path. The assumtion is that server location has been set in HTTP Requests Defaults, or you could do it here as well. Note ${userId_1} parameter, it will come from pre-processor output. Next add a JDBC PreProcessor to get this value from the database:
SELECT ID, NAME, EMAIL
FROM USERS
ORDER BY RAND()
Pre-processor will be hidden from the result view. This is a good and a bad thing — it will be harder to detect any errors in your query but it won't be shown as a test case in the view or stats. You could of course use JDBC Request if you want otherwise. Set variable names to: userId, name, email. They will be accessible through ${userId_1}, ${name_1}, ${email_1}, ${userId_2}, ${name_2}, … The key thing to these tests is that we verify only the first row but randomize the input on the database level by running ORDER BY RAND(). If we want to larger amount of tests, we go back to the Thread Group and change loop count.
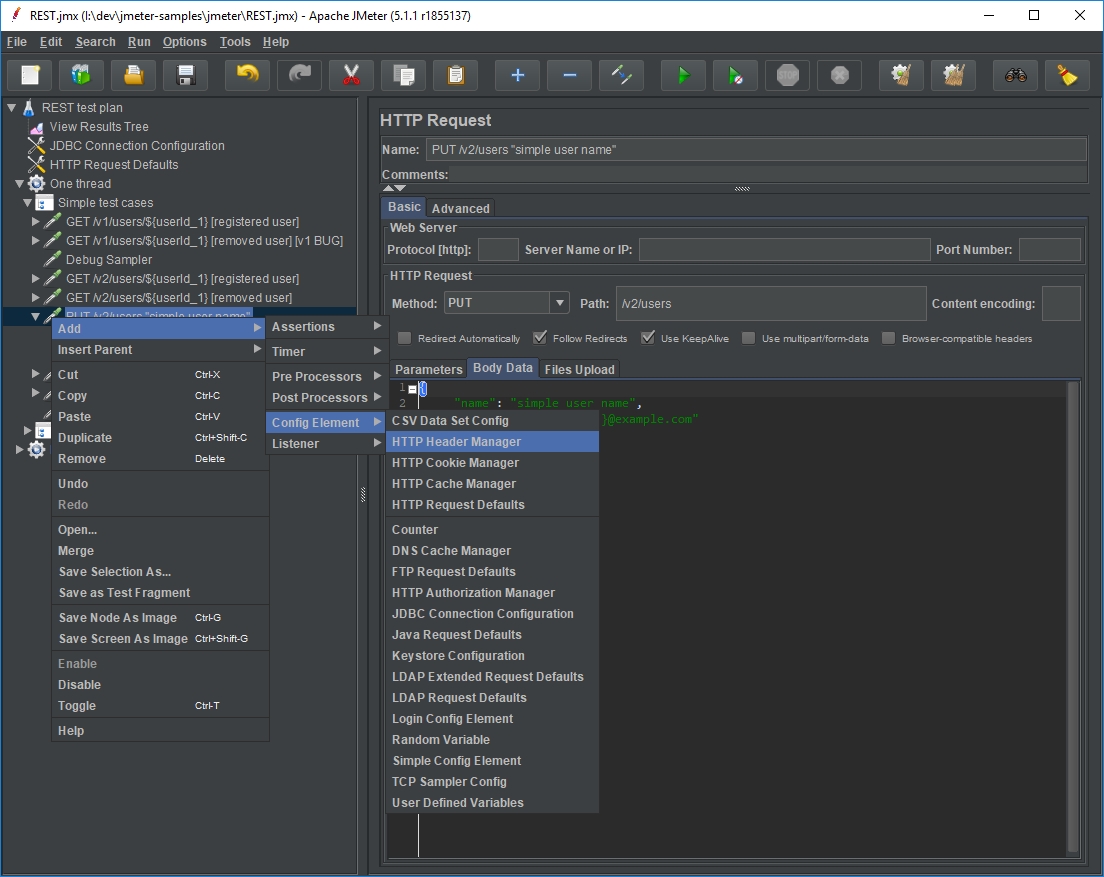
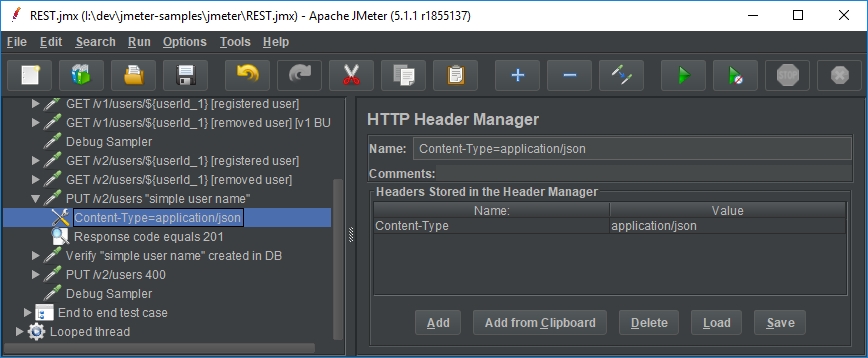
If a JSON body is required to be passed for a method such as POST or PUT a Content-Type=application/json header is required to be set when sending the request. To get it working simply add a HTTP Header Manager under HTTP Request and put the value there.
Assertions
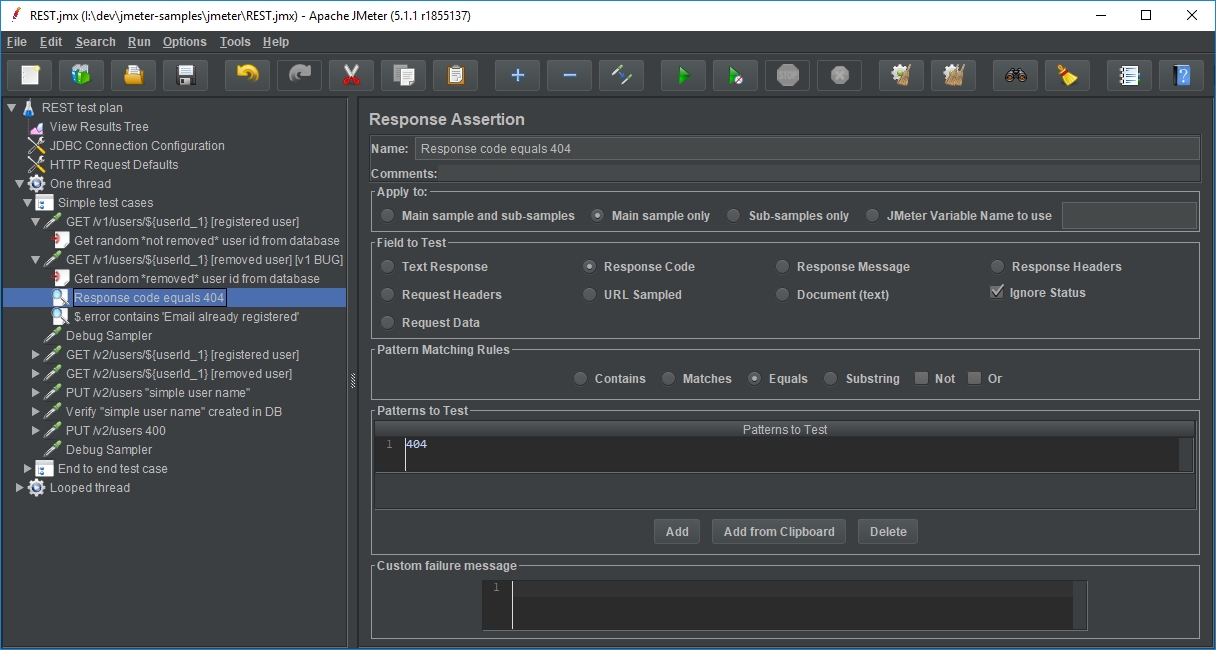
Assertions are core elements for verifying that the data coming from sampler matches the expected values. The most basic assertion is a Response Assertion. However, elementary may the name sound, you can get most of the things done with this assertion. Firstly, we can select where to apply the assertion — to the main sample or some extracted JMeter variable. Next we choose what to test — text response (body), code (status), headers, etc. Note the "Ignore Status" checkbox. By default, a sampler execution will be shown as failed if the response status is unsuccessful. In our tests, however, we might want to verify that the errors are correctly returned in specific cases. In such situation this checkbox must be selected and status assertion should be made. At the bottom you can enter a custom failure message, though, I prefer descriptive assertion names with standard messages instead.
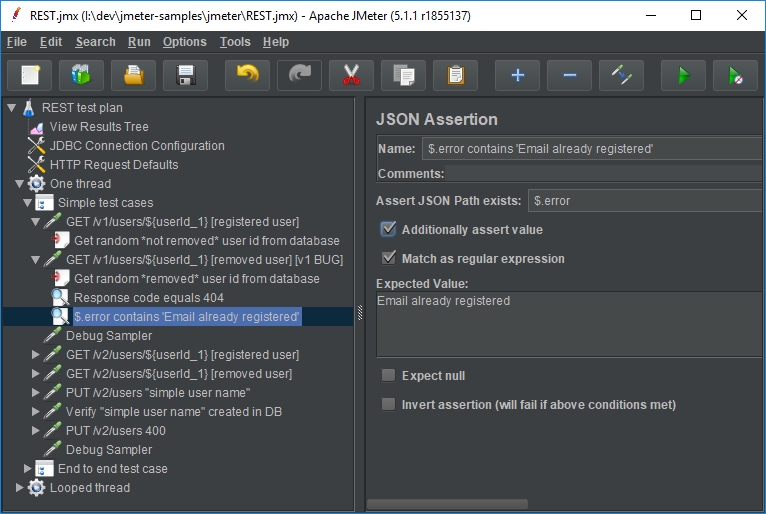
JSON Assertion is another powerful element which can verify response JSON structure. Unfortunately you cannot select any custom variable for this. However, if there is such a requirement, you could do the same thing by combining a PostProcessor JSON Extractor and Response Assertion. This element uses JSON Path. In its default configuration it asserts if the path exists. There are options to assert the value, match a RegEx, expect a null value or invert the assertion. Going back to our API, we may want to verify that the name of queried user matches the database value. To do so, enter $.name in the JSON Path, check "Additionally assert value" and enter ${name_1} (retrived by JDBC PreProcessor) as an expected value. To test JSON Path you could also refer to the View Results Tree, switch to "JSON Path Tester", select sampler from the tree (after test run), enter the expression and press test.
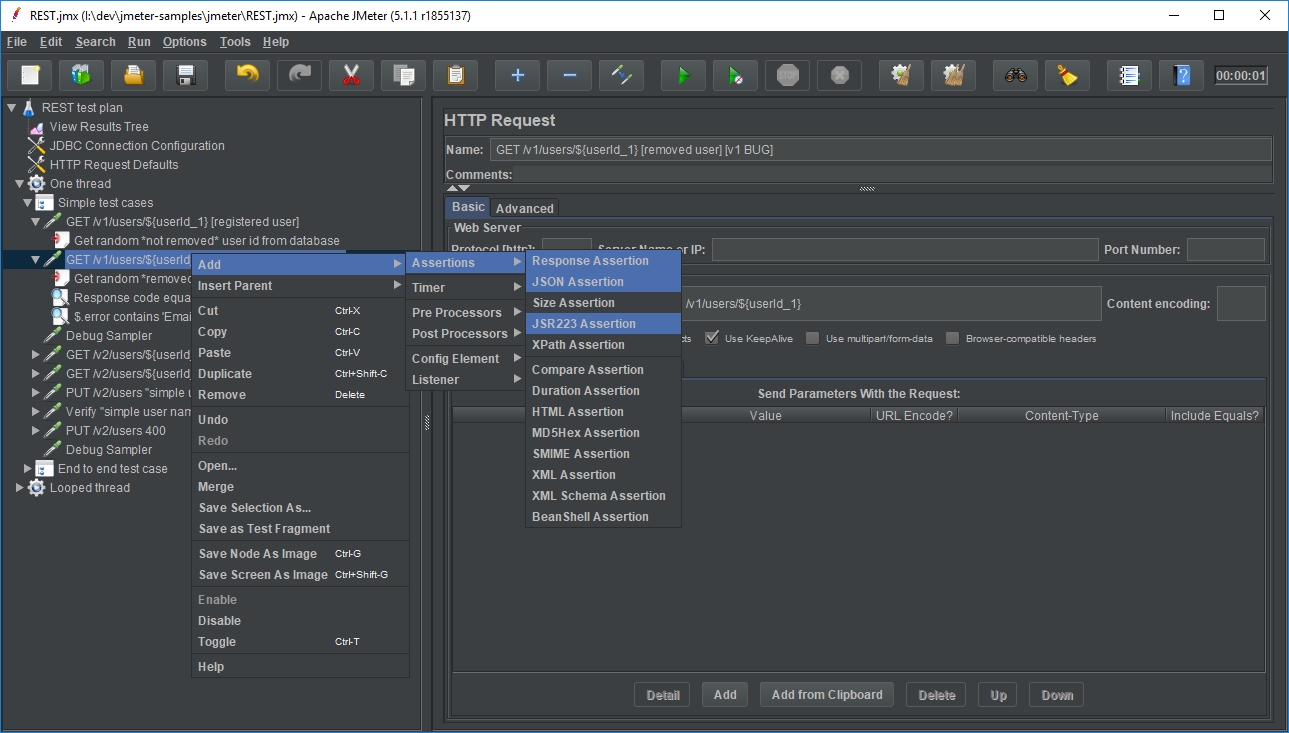
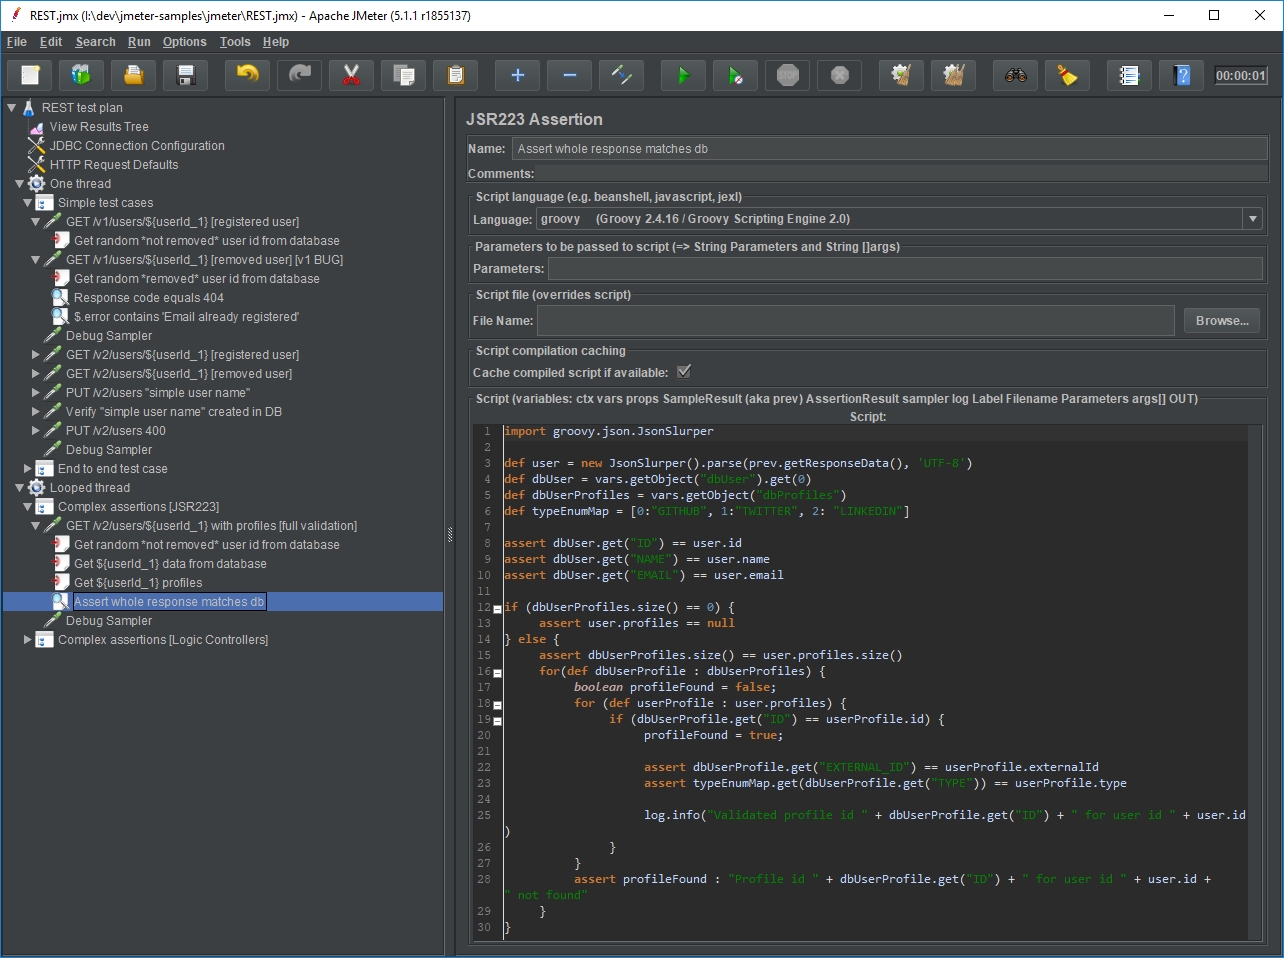
Finally, the most powerful assertion — JSR223 — is a feature that allows using scripting language for our assertions. This requires some programming knowledge but in return makes almost everything possible. In one assertion it's possible to verify whole response at once, even with complex, hierarchical structures that contain collections. I like to use Groovy language here because it's quire fast and due to the language style, as you don't get much help from the editor anyway. Though, it's also possible to use BeanShell or JS if you prefer that. Usually I verify the JDBC result set (here under dbUser result set name from JDBC PreProcessor) against REST response with something like this:
import groovy.json.JsonSlurper

def user = new JsonSlurper().parse(prev.getResponseData(), 'UTF-8')
def dbUser = vars.getObject("dbUser").get(0)

assert dbUser.get("ID") == user.id
assert dbUser.get("NAME") == user.name : "Oh no! The email does not match"
Tips
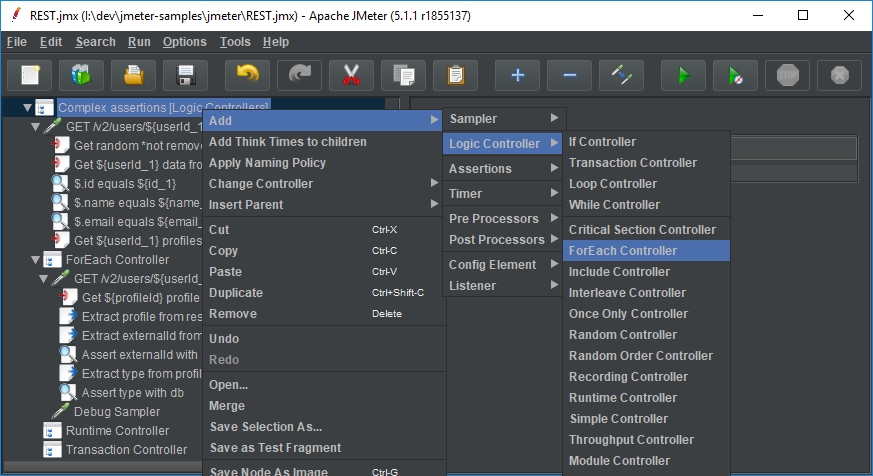
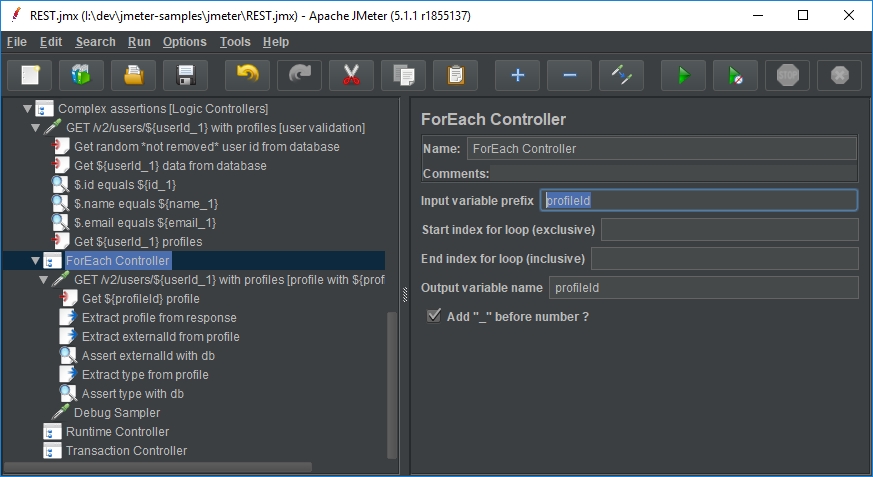
If you'd rather not use JSR223 and have to deal complex structures you might want to stick with combination of JSON and Response assertions with occasional extractors. One of the JMeter flaws is that it's quite hard to verify collections against database at once using only the GUI. The solution for that is to use Logic Controllers e.g. ForEach Controller. With this element we can execute a sampler as many times as there are items in a collection. For example if a user has multiple profiles, we can query the database for all profile ids, and for each one execute a HTTP Request to validate each profile in user response with the database profile. Another valid approach is to create small randomized tests that validate small parts of the interface (has its pros and cons). Final reminder is to add a Debug Sampler while developing the tests which shows the variable values in the View Results Tree.
Due to some known and not resolved issues, undoing and redoing features in JMeter are disabled by default. To enable it, add undo.history.size=30 line to the end of jmeter/bin/jmeter.properties. After that you should be able to see the undo and redo buttons in the toolbar and access the features from the Edit menu.
Check out the source project (link at the bottom of the page) to see a working example. It's mostly standalone, only requires downloading H2 driver jar (read the repository README) for JMeter. If you're interested in learning more — I have an exercise for you. There is a mistake in the specification, read the description and try to detect the bug using JMeter. If nothing rings the bell, refer to the commit description.
Summary
JMeter might not be the best tool for functional testing of REST services, though, it's a valid approach and it's possible to get things done with it. From my point of view there are at least three strong points of this tool. First one is the ability to verify the response data against database and the other way around. It is very desirable when your API does not offer (yet or at all) an option to do an end-to-end testing. You don't need to prepare any test data in advance. Secondly, you can easily target a different environment with a different configuration without too much hassle. Lastly it's very easy to convert the test cases into load tests and verify early any performance and thread issues. On the other hand, as mentioned before, it's not a very developer friendly tool.
